
Tip of the Day 72: Photos and HTML
The Setup Notes tool can also display documents by clicking the “Documents” button under each of the different tabs.
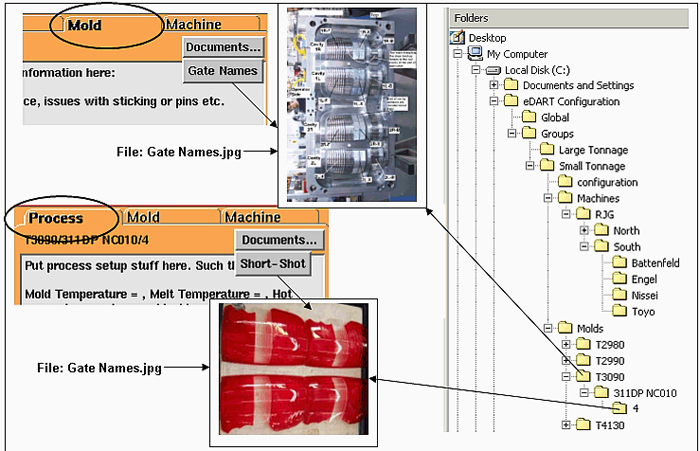
- Each menu item in the “Documents” button list is a file inside the mold, machine or process folder.
- The menu selection text shown is the file name without the extension.
- Place the file in the appropriate folder and it will automatically get sent to the eDART (on job start in semi-auto)
- Allowable file extensions are .jpg (or .jpeg), .gif and .html (or .htm).
- Use .jpg files for photos, .gif files for precision graphics and .html files for fancy text.
- The .gif files are the smallest and appear clearest on the eDART.
- Keep pictures in the 800 x 600 to 1000 x 740 range so that they are not too large to view on the eDART.
- HTML files must be in HTML version 1 format to be viewed on the eDART. Some modern “Word” programs will not save html v. 1. A freeware program called “NVU” will.
Examples
Place photos of part quality problems such as short shots, splay etc. at the lowest level (“Process”).
Place photos showing sensor or gate location names in the mold or special plumbing instructions in the mold name folder.
If you have standard process setup sheets you can convert them to html v. 1 and place them under the lowest level (process).
Machine maintenance photos (such as the location of a filter or lube point) or instructions could go under the machine folder.